You've planted your carrot seeds two weeks ago. The tiny green shoots have emerged, and you notice they're packed so densely together they look like a miniature forest compressed into your garden bed. Now comes the question: Do you really need to thin them out, or can you let nature take its course? The honest answer is that without thinning, you're headed for twisted, stunted carrots instead of the straight, satisfying harvests you dreamed of. This comprehensive guide covers exactly when, how, and why to thin carrots to get the thick, juicy roots that make home gardening worthwhile. Whether you're a first-time gardener or an experienced grower looking to refine your technique, you'll discover practical methods that work in any garden condition.
Why Thinning Carrots Actually Matters (It's Not Just Extra Work)

Thinning feels counterintuitive at first. You're removing healthy looking seedlings that you carefully nurtured from seed. This is probably more frustrating than you'd expect, but here's why it matters so much: Dense seedlings fight constantly for limited resources. They compete for nutrients, water, and light, which means every plant in that crowded space is stressed and growing slowly. Compare a crowded row to a properly spaced one and the difference is obvious within weeks.
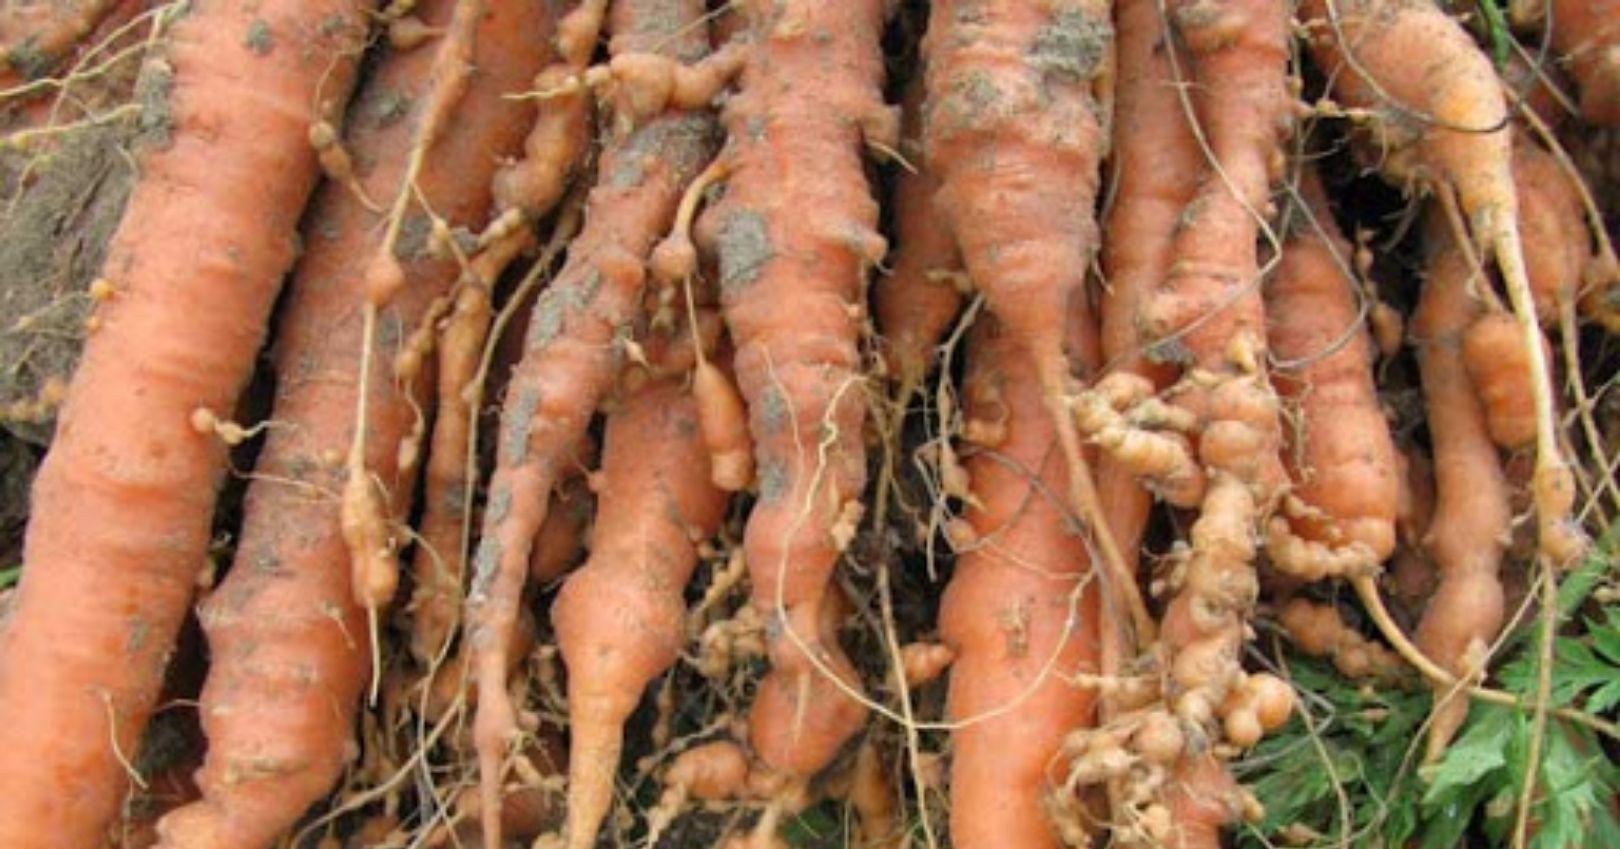
Without adequate space, your carrot roots simply cannot develop properly. Roots need unobstructed soil to grow straight and long. When carrots are crowded, they develop twisted, forked, or severely deformed shapes that make them unmarketable and difficult to prepare. You might harvest two tiny four inch carrots that feel like string instead of a beautiful eight inch carrot that's actually satisfying to eat.
Poor air circulation from overcrowding invites fungal diseases and pest problems. When leaves remain wet longer and air doesn't move freely around plants, powdery mildew, leaf spot, and root rot thrive. Properly thinned carrots stay drier and healthier. Research confirms that thinning directly increases productivity and reduces disease pressure significantly. Studies comparing unthinned beds to properly thinned ones show yield improvements of 50 percent or more. The temporary sacrifice of removing seedlings now pays massive dividends at harvest time.
When Should You Start Thinning Your Carrots?
Timing matters, and earlier thinning is almost always better than waiting. Your goal is to work in two thinning sessions rather than trying to do everything at once.
Your first thinning happens when seedlings reach two to three inches tall. This usually occurs three to four weeks after you sow seeds, though the exact timing depends on temperature and growing conditions. Warmer soil speeds germination and growth, while cool springs slow everything down. The key is to watch seedling height rather than relying on calendar dates. When you look at your carrot patch and see seedlings at two to three inches, that's your signal to begin thinning.
At this first thinning stage, seedlings will have developed their first true leaves and established a small root system. You can see green vigor and actual carrot leaf shape. Your goal is to reduce the initial crowding and leave approximately one inch between plants. During this session, gently remove the weakest or most crowded seedlings while being careful not to disturb the survivors.
Two to three weeks later, you'll perform a second thinning. By now, seedlings are four to five inches tall and you can better identify stronger versus weaker plants. This thinning is more selective. You're removing the less vigorous specimens and achieving your final spacing of two to three inches apart. The second thinning is where you really dial in your spacing for maximum root development.
The risk of waiting too long is real and worth understanding. If you delay thinning until seedlings are six inches or taller, their root systems become deeply entangled. Late thinning inevitably damages surrounding root systems, leaving you with broken roots, exposed roots, and generally failed thinning attempts. Some gardeners try to skip the first thinning and handle everything at once, but this creates more problems than it solves. By the time seedlings are large enough for comfortable handling, significant damage has already occurred. Work with the growth timeline rather than against it.
Temperature conditions affect timing too. Cool spring conditions slow germination and growth, while hot early summer can accelerate everything. Check your seedlings weekly and respond to their actual height rather than assuming a standard schedule applies. This flexibility ensures you thin at exactly the right moment.
The Perfect Spacing Guide for Different Carrot Varieties
Different carrot types have different spacing requirements, and understanding these differences prevents wasted effort.
Standard Varieties: Danvers, Nantes, and Imperator type carrots are the classic full-sized varieties that many gardeners grow. These larger varieties need room for root development and should be spaced one to two inches apart minimum, with two inches being ideal. Row spacing for standard varieties should be twelve inches or more to ensure good air circulation. Your index finger width is almost exactly the right spacing for standard carrots, which gives you a natural measuring tool while thinning.
Mini and Parisian Varieties: Atlas, Adelaide, and other Parisian market types are smaller and can be planted more densely. These varieties tolerate spacing of zero point seven-five to one inch between plants. However, do not overcrowd despite their smaller size. Air circulation still matters for disease prevention. The reduced spacing accounts for smaller root systems, not an excuse to pack them in.

Row and Between Row Spacing: Minimum spacing between rows is six inches, though eight to twelve inches is more standard and provides better accessibility for weeding and harvesting. Many experienced gardeners prefer twelve to eighteen inch row spacing because it allows equipment passage and significant air movement. Consider your garden layout, accessibility needs, and how you'll reach plants for maintenance when choosing row spacing.
Some gardeners use a grid system approach, particularly in raised beds. Place one seedling in each three inch square, which maximizes space while ensuring adequate spacing. This works well if you're precise during thinning, as it gives you a visual reference for consistent spacing.
Three Proven Methods for Thinning Carrots
Choose the method that matches your conditions and comfort level. All three work, but each has specific advantages.
Method One: The Snip (Safest Option)
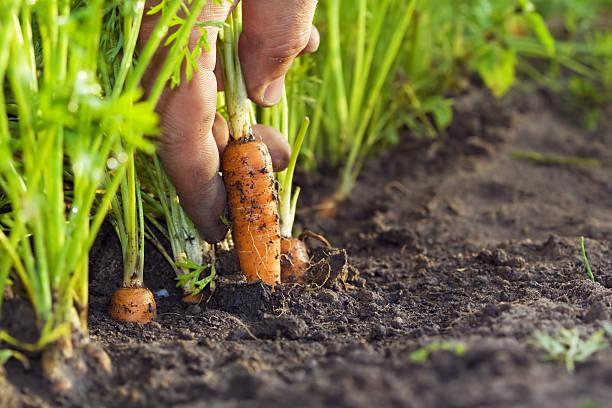
This is the most beginner-friendly and reliable method. Use small scissors, garden snips, or pruners. Position the blade at soil line of the seedling you want to remove. Cut cleanly at the base, removing the entire seedling above soil. Never pull, never disturb the soil around survivors. This is the key to the snip method's safety.
The snip method has tremendous advantages. There is zero disturbance to remaining seedlings, which is critical for delicate root systems. You have no risk of accidentally pulling out neighboring plants, and it works in any soil condition whether wet, dry, or compacted. If you're nervous about thinning, this method builds confidence because nothing goes wrong.
The only disadvantage is that it requires small scissors, which most gardeners don't have on hand. But this is worth fixing. Keep small scissors in your garden tool kit specifically for thinning. Having the right tool transforms thinning from stressful to manageable.
Method Two: The Pinch (Quick and Easy)
The pinch method works when conditions are perfect. Water your patch thoroughly one hour before thinning. Hold the seedling you want to remove at its base between thumb and forefinger. Pinch firmly, snapping the stem at soil level. This method requires a steady hand and practice, but when it works, it's satisfying and quick.
The advantages are obvious. No tools required, quick if you're efficient, and there's something satisfying about the tactile action. However, this method demands practice and perfect soil moisture. Soil that's too wet turns muddy and messy. Soil that's too dry makes snapping difficult. You need that perfect sweet spot where soil is moist but not waterlogged, which is why this method works best in spring when conditions naturally favor it.
Method Three: Wiggle and Pull (The Classic)
This traditional method has proven itself for generations. Water thoroughly one hour before thinning. Hold the base of the seedling you want to remove. Gently wiggle side to side, loosening the connection, then pull straight upward slowly and steadily. This motion helps the root slip out cleanly from the soil rather than dragging.
This method is well-proven and requires no special tools. However, soil conditions must be perfect. Compacted soil causes roots to break. Dry soil makes wiggling ineffective. Too much moisture creates muddy conditions that prevent clean removal. You'll know immediately if conditions aren't right, as the plant will resist your efforts.
Which Method to Choose: Start with the snip method to build confidence and learn the technique without risk. Once you're comfortable, experiment with others. Many experienced gardeners use the snip method by choice because it simply works better than other options.
Prepare Your Garden for Thinning Success
Preparation determines success, so do not skip this step. Your outcome depends more on preparation than on thinning skill itself.
Water your carrot patch approximately one hour before thinning. This timing allows soil to absorb water fully while remaining workable. Soil should feel like a wrung out sponge: moist but not waterlogged, not dripping wet. Soil should be workable and crumbly. Properly hydrated soil releases seedling roots cleanly without resistance or breakage. This single factor makes more difference than anything else in the process.
Choose your timing based on temperature. The best times are early morning or evening, ideally before nine AM or after six PM. Why avoid midday? Heat stress on newly exposed seedlings reduces their survival rate. Avoid thinning on hot, sunny days above eighty-five degrees Fahrenheit. If you must thin during heat, provide shade cloth for the rest of the day. Reduce transplant shock by working in cool conditions when soil is protected from direct sun.
Gather your tools before starting. Small scissors or garden snips, watering can or hose with gentle spray, and optional hand fork for gentle soil fluffing. Have a bucket for collecting thinned seedlings. Clear your space to ensure good visibility and lighting. Remove obstacles for comfortable kneeling. Have clear pathways to avoid stepping on plants while working.
Understand this psychologically before you start. Embrace the temporary sacrifice of removing seedlings for greater harvest success. Remember that tiny seedlings will grow strong with adequate room. Your mindset matters because thinning requires confidence. You're making the right choice even when it feels wasteful.
Seven Common Carrot Thinning Mistakes (And How to Avoid Them)
Learning from others' mistakes helps you avoid the same problems.
Mistake One: Not Thinning At All: You skip thinning entirely, thinking it doesn't really matter or hoping plants will sort themselves out. Consequences are severe: twisted, forked, and stunted carrots; fifty percent or greater yield reduction; and general harvest disappointment. Fix this by forcing yourself to thin. Document the results to reinforce your belief in the process. Set calendar reminders for when seedlings reach two inches tall. Next season, you'll see the dramatic difference and never skip thinning again.
Mistake Two: Pulling Instead of Snipping: You grip and yank upward on unwanted seedlings, trying to remove them quickly. This disturbs, damages, or uproots neighboring plants. You end up with broken roots, exposed roots, and a failed thinning attempt. The fix is simple: use scissors instead. Snip cleanly at soil line. Prevention means buying small scissors specifically for this task. Having the right tool prevents this mistake entirely.
Mistake Three: Thinning Too Late: You wait until seedlings are six inches tall before beginning. By this point, root systems are deeply entangled and impossible to thin without massive disruption. Thin by seedling height rather than calendar date. Check seedlings weekly and thin as soon as they reach two inches. Prevention starts with weekly monitoring rather than ignoring your carrot bed.
Mistake Four: Inconsistent Spacing: You thin some areas to one inch, other areas to three inches. Result: uneven root development with some large carrots and others stunted. Fix this by measuring spacing as you go. Use finger width as your visual guide. Prevention requires taking time and working methodically rather than quickly.
Mistake Five: Overcrowding Despite Thinning: You thin, but still leave too many plants. Plants still compete, roots still twist, and yields remain poor. One carrot per inch is the target, not optional. Reference your spacing guide and be bolder in removing plants. Prevention means accepting that yes, you really do need to remove that many seedlings.
Mistake Six: Thinning During Heat Stress: You thin in bright sun at midday temperatures above eighty-five degrees. Surviving seedlings wilt and stress, and some die despite successful thinning. The fix: thin during cool morning or evening hours. Prevention starts by checking the forecast and scheduling thinning before nine AM or after six PM.
Mistake Seven: Forgetting to Water After Thinning: You thin successfully but skip watering afterward. Exposed soil dries out and roots are harmed. The fix: keep your hose ready and give remaining plants gentle water as your last thinning step. Prevention means making watering the final step of every thinning session.
Pro Tip: Keep notes on your thinning date and spacing. Next season, you'll know exactly how your choices affected your harvest. This personal data becomes more valuable than any guide because it's specific to your garden conditions.
After Thinning: Essential Aftercare Steps
Aftercare determines whether your thinning efforts actually pay off or get wasted.
After thinning is complete, water the entire bed using a gentle spray or soaker hose, not a harsh stream. This settles soil back around exposed roots and reduces transplant shock and stress. Soil should be moist to one inch depth. This gentle watering is not optional. It makes the difference between thriving and struggling plants.
Carrot roots begin at soil surface. As they develop, soil can wash away from rain, exposing root shoulders. Green shoulders, which are the exposed tops, become bitter and inedible. Gently mound soil one inch high around each plant after thinning. Do this immediately after thinning, especially after rain. This prevents green shoulders and keeps roots protected.
Watch newly thinned seedlings for wilting over the next day. Provide shade cloth if temperatures exceed eighty-five degrees Fahrenheit. Wilting should resolve by next morning. If wilting persists, check soil moisture by squeezing: soil should be moist but not soggy.
Hold off on fertilizing for one week after thinning. Plants need recovery time, not additional stimulus. Resume normal fertilizing schedule after seven days. This prevents additional stress during recovery.
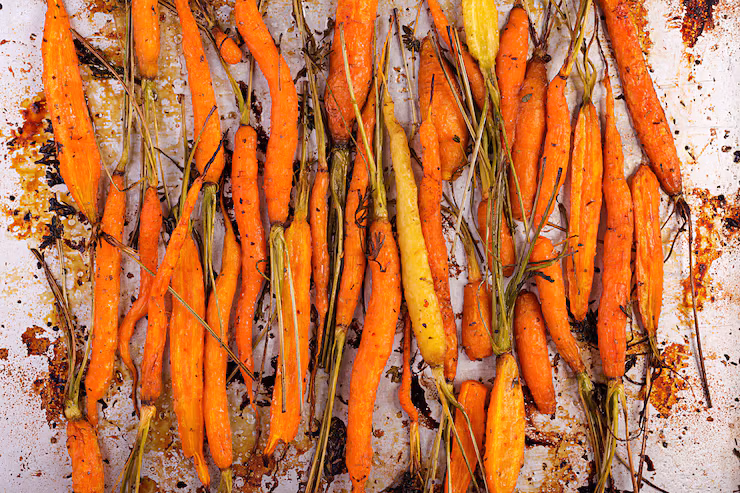
Do not discard your thinned seedlings. Baby carrots at two to three inches tall are completely delicious raw, steamed, or in salads. Carrot greens are edible and nutritious. Make microgreens for garnish or salad addition. This turns an apparent loss into an extra harvest. Nothing gets wasted.
Watch for pest issues after thinning. Carrot rust fly is attracted to exposed plant tissue. Bury thinned plants in your compost immediately. Clean up any scattered plant material left on soil surface. This simple practice prevents pest problems.
Skip Thinning Altogether: Alternative Prevention Methods
If you find thinning frustrating, these alternatives exist.
Pelleted Seeds: These are carrot seeds coated with inert clay, making them larger and easier to handle. You can plant them individually at correct spacing, which dramatically reduces or eliminates the need for thinning. Pelleted seeds give you perfect accuracy, especially if you use a precision seeder. Advantages are obvious: fewer or zero thinning sessions needed, consistent spacing achieved during planting, less stress on delicate seedlings. Germination rate typically reaches eighty to ninety percent.
The disadvantage is slightly higher seed cost. Pelleted seeds also require careful spacing during planting. This demands focus and precision. You still need to watch for germination failure and thin occasionally when multiple seeds germinate in one spot. Even with pelleted seeds, you may need light thinning, so consider this a reduction in effort rather than complete elimination.
Strategic Planting Density: The concept is to sow seeds at precise spacing from the start. The challenge is that carrot seeds are tiny and difficult to space manually. Success rate is lower than pelleted seeds. Some germination failure is normal. This technique works if you're patient and precise, but most gardeners prefer pelleted seeds for better results.
Succession Planting: Plant multiple small batches rather than one large batch. This spreads the thinning workload across several dates instead of concentrating it. Disadvantage: This doesn't eliminate thinning entirely. You're just breaking it into smaller sessions.
Reality Check: Even with pelleted seeds or careful spacing, you may need minor thinning. Plan for it rather than hoping to avoid it completely. Prevention methods reduce your work but rarely eliminate it entirely.
Monitor Your Carrot Plant Health Using AI Powered Tools
Your carrots are now spaced perfectly, and the work isn't finished. As seedlings develop into mature plants, staying alert to potential health issues ensures your effort pays off. Leaf color should be deep green and vigorous. Watch for yellowing, stunting, or any color changes that indicate problems. Monitor for early signs of disease or pest damage. Nutrient deficiency symptoms appear as color changes or abnormal growth patterns. Maintain consistent soil moisture. Watch for disease development before visible damage spreads too far.
Modern AI powered plant care tools can analyze plant images to identify health concerns early. Plantlyze is an AI powered plant care diagnosis tool that helps gardeners detect problems like powdery mildew, nutrient issues, and pest activity in real time. Rather than wondering what's wrong with your carrots, you get immediate feedback based on image analysis. Early detection means early intervention. Prevent small issues from becoming harvest destroying disasters.
Take photos of your carrot patch weekly. Use tools like Plantlyze to scan for emerging problems. This simple practice catches issues at the stage where they're easiest to fix. Monitor your carrot patch's health using AI diagnostic tools at plantlyze.com to catch problems before they spread and steal your harvest. Early intervention saves your entire crop and justifies the minimal effort required.
Frequently Asked Questions About Carrot Thinning
Can I really eat the baby carrots I thin out?
Absolutely. Thinned carrots, even at two to three inches tall, are completely edible and tender. They're sweet and delicious raw or lightly steamed. The greens are also edible and nutritious. Many gardeners grow carrots specifically for baby carrot harvests during thinning sessions. Do not waste them. These baby carrots are a bonus harvest that most gardeners overlook.
What if I forget to thin my carrots until they are six inches tall?
At six inches, root systems are significantly entangled. Thinning is risky and will likely damage many plants. If you must thin at this point, be extremely gentle, work slowly, and expect some losses. Better option: leave them crowded and harvest early as baby carrots, though yields will be lower. This is why weekly monitoring matters so much. Catching them at two to three inches makes everything easier.
How do I know which seedlings to keep and which to remove?
Keep the strongest, healthiest looking seedlings. Remove weak, thin, or discolored ones. During first thinning, it's mostly about reducing numbers. During second thinning, you can be more selective about plant vigor. Look for dark green color, sturdy stems, and normal growth patterns.
Is there really a best time of day to thin?
Yes. Early morning or evening is significantly better than midday heat. Morning is ideal because plants have recovered from overnight and soil is still cool and moist. Avoid thinning between ten AM and four PM. This timing matters for plant survival rates, not just comfort.
Should I compost my thinned seedlings?
Yes, but bury them in the compost pile rather than leaving them on soil surface. Do not leave plant material on soil surface where carrot rust flies can be attracted to them. Buried in active compost, seedlings contribute nitrogen and break down quickly. This is the safest approach.
How tight can I space carrots if I am OK with smaller roots?
Even for smaller carrots, spacing should be at least zero point seven-five to one inch. Below that spacing, roots become severely malformed. There is no advantage to spacing closer than zero point five inch. It only creates deformed, unmarketable roots that are worse than properly spaced small carrots.
Can I thin carrots multiple times, or just twice?
Most gardeners thin twice: at two inches and then at four to five inches. Some do a third light thinning at six to seven inches if plants touch again. Excessive thinning causes repeated stress. Two thinning sessions is optimal for most gardeners and growing conditions.
Your Path to Perfect Carrots
Carrot thinning transforms from frustrating chore to essential practice once you understand why it matters. Those crowded seedlings in your garden are a temporary test of your commitment to growing quality carrots. Every seedling you remove now is an investment in the straight, juicy, satisfying carrots you'll harvest in three to four months. The small effort you invest in proper thinning pays dividends in yield, quality, and disease prevention.
Start with the snip method if you're nervous. Work in cool morning hours when conditions are perfect. Water before thinning and after. Monitor your plants weekly so you never miss your thinning window. Document your results so you build confidence in the process. Next season, you'll approach thinning with certainty rather than hesitation, knowing exactly what results to expect.
Your carrot harvest is determined as much by thinning decisions as by any other factor in growing carrots. Make those decisions confidently, act on them promptly, and trust that the temporary sacrifice creates permanent success. Perfect spacing leads to perfect carrots. Begin thinning today and taste the difference at harvest time.
References
1. NC State University Extension
https://www.ncsu.edu/
2. University of California Cooperative Extension
https://celosangeles.ucanr.edu/
3. USDA Agricultural Research Service
https://www.ars.usda.gov/
4. Penn State College of Agricultural Sciences
https://www.psu.edu/
5. University of Vermont Agricultural Experiment Station
https://www.uvm.edu/