There’s something viscerally satisfying about biting into a pepper you’ve grown. It tastes so much fresher, costs a tiny fraction of supermarket prices and stands as your accomplishment as an amateur gardener. But c’mon — the road is not always straightforward. A lot of gardeners miss out because pepper plants are so finicky. Flowers drop before setting fruit. Leaves turn yellow. The plant fills out but remains fruitless. These frustrations lead people to assume they don't have a green thumb for peppers.
Here's the truth: pepper plants aren't finicky. They just have specific needs, and once you understand what those are, success becomes almost automatic. This guide walks you through every stage of pepper plant care, from planting seeds indoors through harvesting ripe fruit. You'll learn exactly why peppers thrive in certain conditions and what happens when those conditions shift. By the end, you'll know whether your plants' symptoms signal a problem or simply natural behavior. We'll cover lighting, soil, watering, temperature, fertilizing, starting from seed, transplanting, dealing with pests and diseases, and harvesting. For specific issues you can't quite diagnose, tools like Plantlyze make identifying plant problems instant and accurate. Let's get started with the fundamentals.
Understanding Your Pepper Plant Basics

Before you learn about what care the plants need, it's good to know how these pepper trees work. Peppers are warm-season plants who love conditions that make you feel like you’re in the tropics. They don’t ask for much, but they are selective about their surroundings. Peppers, on the other hand, hate cold nights; even cooler and their leaves seem to curl up like fists. This tropical preference determines all the care choices you will make.
You can grow peppers outdoors in most climates, indoors with grow lights year-round or in containers on patios and balconies. Both ways shine when done right. The journey from seed to first fruit will take about 16 to 20 weeks, so timing planning is key. Starting seeds indoors in winter gives you the head start you need. The satisfaction of that first homegrown pepper makes every bit of effort worthwhile.
Lighting Requirements: Why Peppers Love the Sun

Your peppers crave sunlight, so provide them with at least 6 to 8 hours of direct sun daily. This isn't negotiable if you want productive plants. Light directly affects flavor development, heat level in hot peppers, and fruiting success. Without adequate light, you'll get foliage but minimal fruit. The good news is that peppers aren't as finicky about light as some crops—6 to 8 hours does the job, though more is better.
Should you grow pepper plants indoors, or are just starting seedlings, the needs will increase exponentially. Seedlings require 15 hours of artificial light daily, replicating extra-long summer days and resulting in stout, stocky plants instead of leggy ones. Raise grow lights up to about 3 inches above seedlings and lift them as plants grow. Without this light, even with all other conditions ideal, indoor seedlings turn into weak-legged wraiths. You can use standard LED grow lights, which are affordable and energy-efficient. Once seedlings reach 8 to 10 weeks old and you've hardened them off, they can transition to outdoor conditions with natural light.
Watch for signs of insufficient light—pale leaves, slow growth, and most tellingly, a lack of flowers despite proper temperature and nutrients. If you see these symptoms, either provide more light or reconsider your growing location. Moving plants to a sunnier spot often solves the problem completely.
Soil Preparation: Building the Foundation
Quality soil with excellent drainage is your pepper plant's foundation. This matters more than most beginning gardeners realize. Peppers absolutely require soil that drains well because their roots cannot tolerate waterlogged conditions. Soggy soil invites root rot, which kills plants quickly.
Your soil should contain high levels of organic matter—compost, aged manure, or coconut coir. Organic matter improves drainage in heavy clay soils while improving water retention in sandy soils. It's the garden's great balancer. For ground beds, amend your soil with 2 to 3 inches of quality compost worked into the top 8 to 10 inches before planting. For containers, use a high-quality potting mix rather than garden soil. Garden soil compacts in containers and drains poorly, causing the very problems you're trying to avoid.
A simple test checks your soil's drainage. Dig a hole about 12 inches deep, fill it with water, and watch how long it takes to drain. If water drains within an hour, you're good. If it sits for longer, amend your soil with more compost or perlite to improve drainage. Once planted, wait about 3 weeks before adding mulch. This timing allows the soil to warm up in spring, which peppers appreciate.
Mastering the Watering Schedule
Consistent watering is the difference between thriving peppers and struggling plants. Peppers are sensitive to both drought and waterlogging, so getting this right directly impacts your harvest. Don't water on a fixed daily schedule. Instead, water when the top inch of soil feels dry to the touch. For most situations, this means watering every 2 to 3 days during growing season, with the goal of keeping soil evenly moist but never soggy.
The rule of thumb is 1 inch of water per week, whether from rain or your watering can. This might mean deep watering twice a week or lighter watering more frequently—it depends on your climate, soil type, and container size.Water in the early morning so leaves have time to dry by nightfall. Leaves left wet at night set the stage for fungal diseases, including powdery mildew and anthracnose. Water well after transplanting, and do not water again until 1 to 2 weeks have passed with no regular watering. This promotes root growth down towards moisture, making for better plants.
Watering on a predetermined timetable, regardless of the actual moisture of the soil; allowing soil to become too dry and failing to remember that “the punchline is always in root rot” by watering more than necessary just to be safe are among common mistakes. Master that, and you’ve conquered one of the greatest difficulties new pepper growers encounter. Young seedlings require a lighter touch — water from below rather than above to prevent damaging those fragile stems.
Temperature and Humidity Control
Peppers perform best when daytime temperatures stay between 70 to 80 degrees Fahrenheit, with nighttime dips to 60 to 75 degrees. This fluctuation mimics natural outdoor conditions and encourages strong growth and fruiting. For seed germination specifically, warmer soil temperatures are essential. Aim for 85 degrees Fahrenheit for optimal germination, which typically occurs within 7 to 14 days at this temperature. A heat mat under seed trays speeds germination considerably.
Above 90 degrees, pepper flowers drop before setting fruit. This isn't a disease or deficiency—it's the plant's stress response. In very hot climates, afternoon shade cloth in mid-summer helps prevent flower drop and fruit sunscald. Below 60 degrees, growth slows dramatically and plants essentially pause. Cold temperatures also prevent successful fruit set even if flowers develop.
Humidity between 70 to 80 percent relative humidity is ideal, though peppers tolerate ranges from 50 to 80 percent. Below 50 percent, plants experience stress. Indoor growers should monitor humidity, especially with artificial heating in winter. A simple hygrometer costs a few dollars and tells you exactly where you stand. If humidity is too low, mist plants lightly or group containers together to create a more humid microclimate.
Fertilizing for Maximum Growth
Peppers will bear fruit for quite some time without added fertilizer, whether grown in containers or rich garden soil. But potted peppers exhaust their soil nutrients more quickly than plants in the ground, so they require fertilizer more frequently. With growth slows to a halt or leaves begin yellowing, your plants are probably starving for nutrients.
Tomato fertilizers are great for peppers because they are balanced for fruiting crops. When your seedlings are around 6 inches (15 cm) tall start feeding every couple of weeks during the growing season. A more organic option would be to apply fresh compost around the base of plants in 3 weeks after they’ve been transplanted. This slowly feeds your peppers and amends soil at the same time. For an organic option, fish emulsion or seaweed extract delivers nutrients without harsh chemicals.
Overfertilizing is a common mistake. Too much nitrogen encourages lots of green growth, rather than flowers and fruit. And you want balanced growth, not just a giant green tree with no peppers. If you have lots of leaves but hardly blooms, your plant is probably receiving too much nitrogen. Lighten up on fertilizer, and give it a tighter focus on fruiting instead.
Starting Peppers from Seed Indoors
Starting pepper seeds indoors gives them a crucial head start before outdoor planting. This process takes about 8 to 10 weeks total, so timing matters. Count backwards from your region's last expected frost date and plant seeds 8 to 10 weeks before that date. If your last frost is May 15, start seeds around mid-March.
Fill seed trays with pre-moistened seed starting mix—not regular potting soil, which is too heavy. Make shallow holes about 1/4 inch deep and place one seed per hole, spacing them about 1 inch apart. Cover gently with soil. Create a humid environment using a plastic dome or bag over the tray. Place the tray on a heat mat set to 85 degrees Fahrenheit. Check daily; don't let the soil dry out completely. Seeds should germinate within 7 to 14 days at this temperature.
Once sprouted, remove the dome and provide bright light immediately. This is critical—without light, seedlings become leggy and weak. Provide 15 hours of light daily, either from a sunny south-facing window or, more reliably, from grow lights positioned about 3 inches above the seedlings. Add a gentle breeze with an oscillating fan on low speed. This strengthens stems and prevents damping-off disease, where seedlings collapse at the soil line.
Water seedlings from below rather than overhead. Set the tray in a larger container of water and let the soil absorb moisture from underneath. This prevents fungal issues and avoids damaging delicate stems. At 4 to 6 weeks old, seedlings are ready to pot up to larger individual containers, usually 4-inch pots. At 8 to 10 weeks old, they're ready to begin hardening off for outdoor transplanting.
Transplanting and Hardening Off
Hardening off is the process of gradually acclimating indoor-grown seedlings to outdoor conditions. This prevents shock and ensures successful transplanting. Start 1 to 2 weeks before your planned outdoor planting date. Place seedlings outside in a sheltered, shaded location for 1 to 2 hours the first day. Each day, gradually increase their time outdoors and expose them to more sunlight. By the end of week, they should spend entire days outside, returning inside only at night. After one final week of 24-hour outdoor exposure, they're ready for permanent planting.
Space pepper plants 18 to 24 inches apart in gardens or use 5-gallon containers for container growing. Soil temperature should be at least 60 degrees Fahrenheit, though 70 degrees is better. Water deeply after transplanting, then wait 1 to 2 weeks before resuming regular watering. This encourages deep root development. About 3 weeks after transplanting, add a 2-inch layer of mulch around plants, keeping it several inches away from the stem. Mulch prevents soil moisture loss, maintains consistent soil temperature, and prevents soil splashing that spreads fungal diseases.
Some growers remove early flowers that appear on young transplants. This seems counterintuitive, but it redirects energy into root and vegetative growth rather than fruit. Plants are stronger and more productive long term when given time to establish robust root systems before fruiting. When the plant reaches 6 to 8 inches tall, it can support fruit production. Also, prune low-hanging leaves once fruiting begins—this improves air circulation and prevents disease.
Managing Pests and Diseases

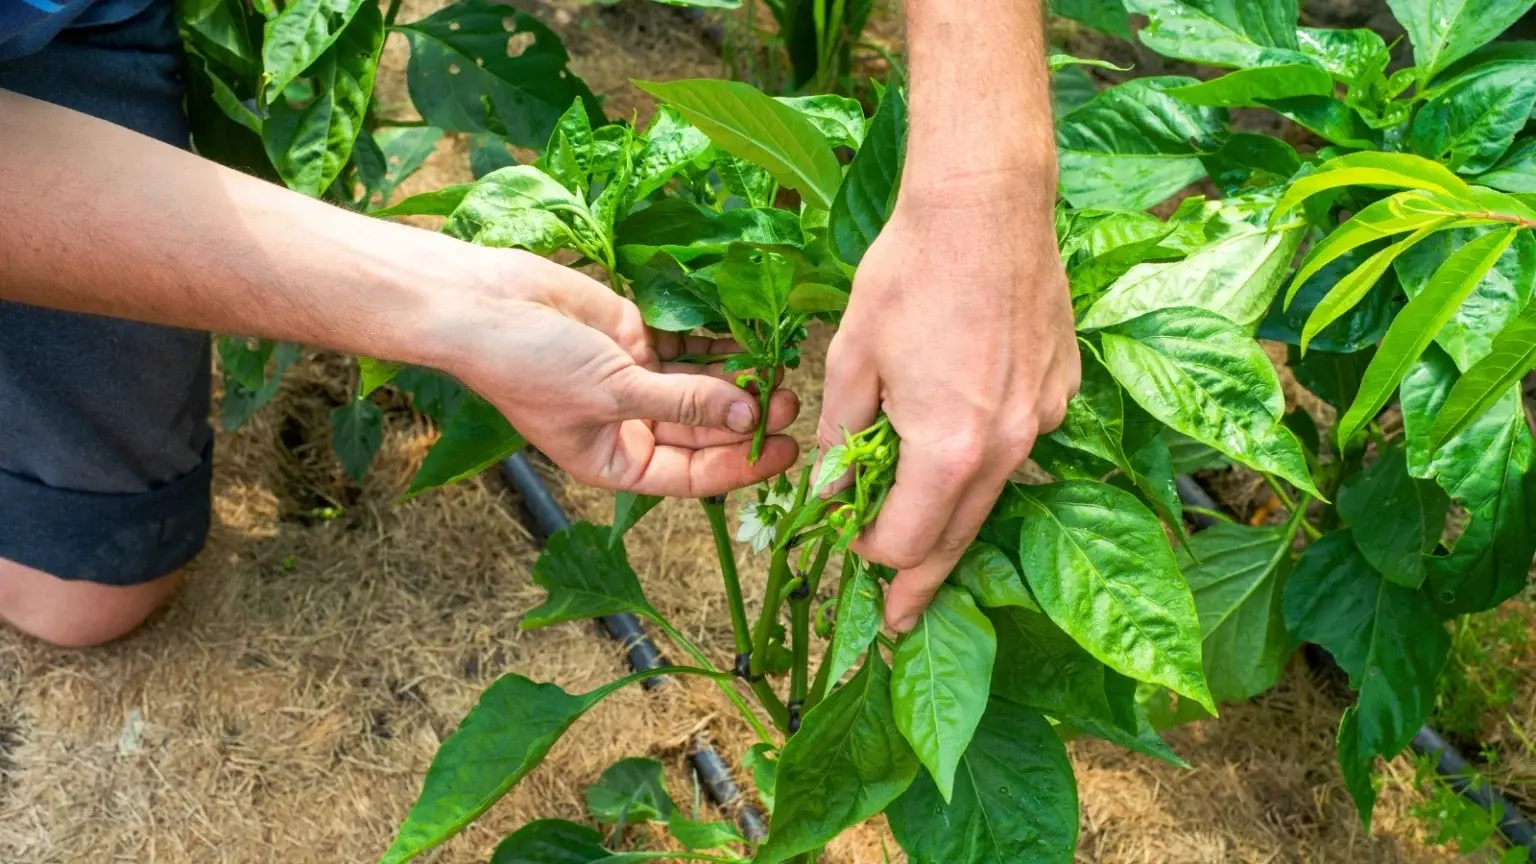
While pests can seem overwhelming, most are preventable or manageable with consistent monitoring. The best approach is preventing problems before they start by maintaining good air circulation, removing weeds that harbor pests, and monitoring leaf undersides weekly starting mid-summer.
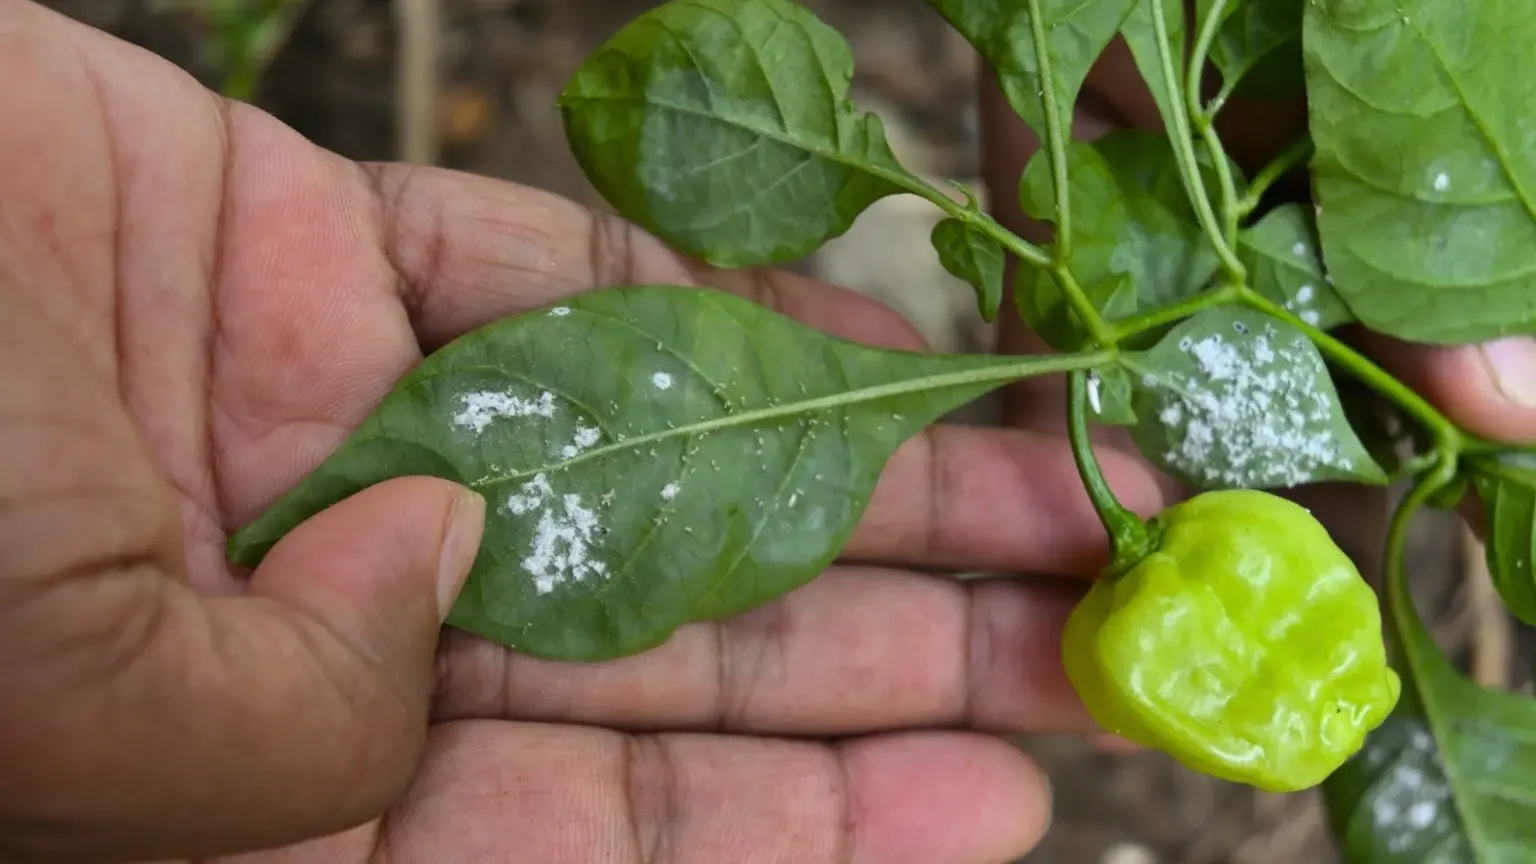
Common pests include aphids, which cluster on new growth and transmit viruses; whiteflies, tiny insects on leaf undersides leaving sticky residue; cutworms, which damage seedlings at soil level; spider mites, which create fine webbing; hornworms, large visible caterpillars that are easy to remove by hand; flea beetles, tiny jumping insects; and pepper weevils, which lay eggs inside fruit. For most pests, spray affected areas with a strong water stream to dislodge them, repeating every few days. Insecticidal soap or neem oil provides treatment for more severe infestations.
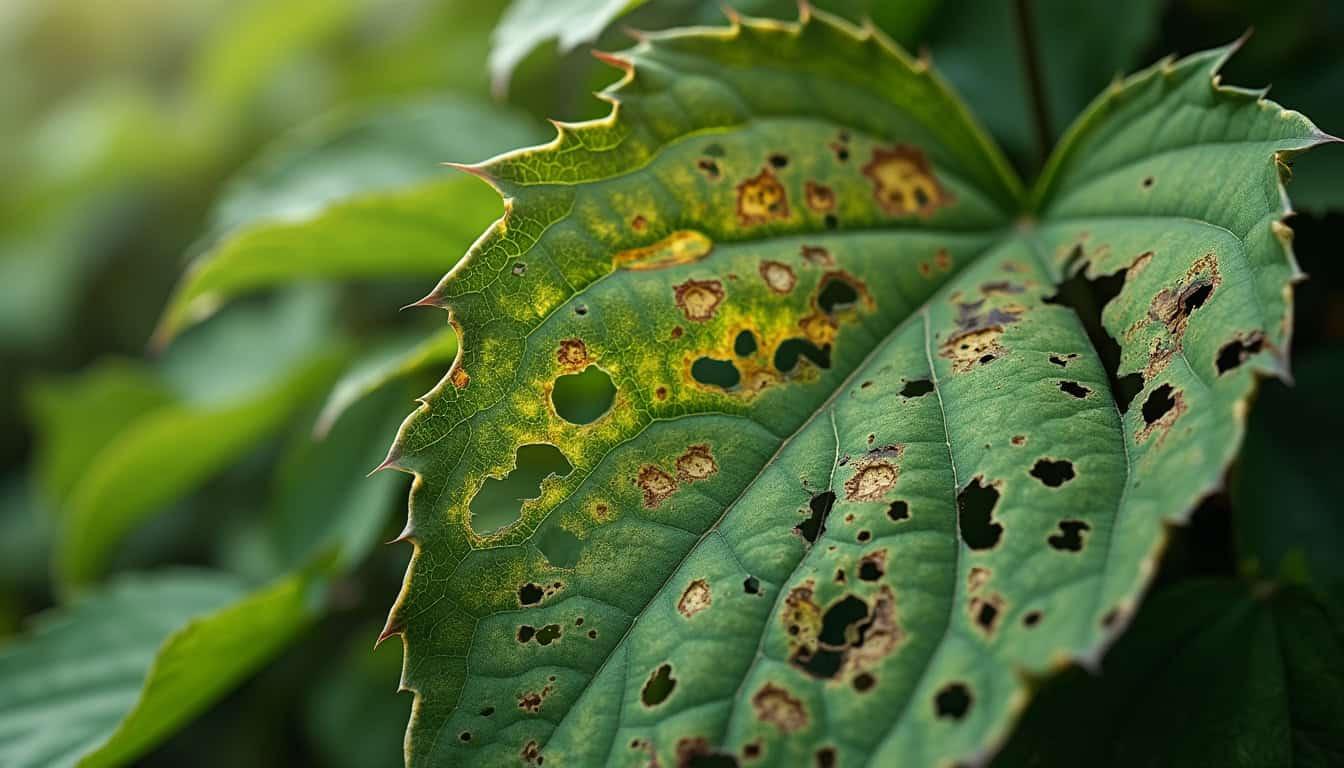
Common diseases include bacterial leaf spot, causing yellow spots and leaf drop; mosaic virus, which causes mottled yellowing and is irreversible once infected; powdery mildew, favored by warm, humid conditions; anthracnose, a fungal disease spreading through soil splashing; and blossom end rot, which appears as dark spots on fruit bottoms caused by calcium deficiency and irregular watering. Prevention is far easier than treatment. Space plants for good air circulation, water at soil level early in the day, avoid overhead watering, remove infected leaves promptly, and choose disease-resistant varieties when available. If mosaic virus appears, which spreads through contact, remove and destroy the entire plant immediately to prevent spread.
Pruning and Maintenance Tips
Strategic pruning promotes bushier growth and encourages the plant to direct energy toward fruit rather than excessive foliage. Remove lower leaves once fruiting begins—this improves air circulation and prevents fungal diseases that splash from soil. Remove the first flowers that appear on young transplants to redirect energy into vegetative growth rather than early fruit.
As plants mature and begin producing, you can prune selectively to open up the center of the plant. Remove crossing branches and dead or diseased growth. This improves light penetration and air circulation. Some growers remove leaves that shade developing fruit, which can actually speed ripening and increase fruit quality. Pruning isn't required for peppers to produce, but it helps maximize your harvest and plant health.
Harvesting and Timing
Determining pepper ripeness depends on what you want. Green peppers are fully mature but not ripe. They're firm and ready to harvest, though flavor develops more fully once peppers change color. Most peppers naturally progress through color changes as they ripen—green to yellow, orange, red, or purple depending on the variety. Ripe peppers have more complex flavor and higher nutrient content than green peppers.
Color changes and maturity happen gradually. A green pepper can sit on the plant for weeks before transitioning to color. If you want colored peppers, patience is required. However, harvesting early green peppers diverts plant energy into producing more fruit, extending your overall harvest. Many gardeners use both strategies—harvest some peppers green to encourage continued production, and let others ripen fully for maximum flavor.
Cut peppers from the plant rather than pulling them—pulling can damage branches. Storage depends on your plans. Ripe peppers keep in the refrigerator for 1 to 2 weeks. If you've got more peppers than you can use, freeze, dry, or can them. Overwintering pepper plants indoors extends production indefinitely. Cut them back severely, move them inside, and provide light and warmth. They'll regrow and produce fruit through winter, though production is reduced compared to outdoor summer growing.
Frequently Asked Questions
Why are my pepper flowers dropping? Usually it's temperature stress, inconsistent watering, or inadequate light. Pepper flowers are sensitive to changes in their environment. When nighttime temperatures drop below 60 degrees, daytime temperatures spike above 90 degrees, watering is irregular, or light is insufficient, the plant conserves energy by dropping flowers before they develop into fruit. The good news is that once you stabilize conditions, new flowers will develop and set fruit properly. No permanent damage occurs. If you're unsure which factor is affecting your peppers, Plantlyze can help identify conditions using your plant photos.
Can I grow peppers indoors year round? Absolutely. Indoor growing requires consistent artificial light, temperature control between 70 to 80 degrees, and humidity between 50 to 80 percent. With these elements managed, peppers produce fruit indoors. Production is typically slower than outdoor summer growing, but year-round harvests are completely possible. This is ideal for gardeners in cold climates or those wanting fresh peppers in winter.
How long until peppers produce fruit? From seed to first fruit typically takes 16 to 20 weeks. Seedlings require 8 to 10 weeks indoors before transplanting. After transplanting outdoors and hardening off, count another 6 to 10 weeks until flowering begins, then 2 to 3 weeks for fruit to develop from flower. The timeline varies with variety, growing conditions, and temperature.
What's wrong with my yellowing leaves? Several causes exist. Lower leaves gradually yellowing and dropping is often natural as the plant matures. However, yellowing can also signal nitrogen deficiency, overwatering causing root rot, or spider mite infestation. Check soil moisture by squeezing a handful—if water drips out, you're overwatering. Look at leaf undersides for tiny webbing indicating spider mites. If only older lower leaves yellow, it's likely natural. Apply balanced fertilizer if you suspect nitrogen deficiency.
Do all peppers need the same conditions? Most peppers have similar requirements, but hot pepper varieties often tolerate higher temperatures better than bell peppers. Growing conditions that produce mild flavor in one variety might produce intense heat in another. Temperature and stress actually affect capsaicin levels, making peppers hotter under challenging conditions. Research your specific variety for any special requirements.
How much light do peppers really need? The minimum is 6 to 8 hours of direct sun daily for outdoor growing. More light increases flavor development and heat levels in hot peppers. Indoor seedlings require 15 hours of artificial light daily. Once seedlings are hardened off and transplanted outdoors, they follow the 6 to 8 hour rule. If you're growing indoors year-round, 12 to 14 hours of grow light daily supports productive growth.
Can I grow peppers in containers? Absolutely. Peppers thrive in 5-gallon containers with quality potting soil, drainage holes, and consistent watering. Container-grown peppers need more frequent fertilizing than in-ground plants because soil nutrients deplete faster. They also dry out more quickly, requiring more frequent watering checks. The tradeoff is flexibility—you can move containers to optimize light and protect from weather.
Troubleshooting with Plantlyze
When you encounter something unusual that you can't quite identify, getting expert help removes the guesswork. Plantlyze offers AI-powered plant diagnosis that eliminates confusion. Simply photograph the affected area—whether it's a pest, disease, unusual leaf color, or growth pattern—and upload it to Plantlyze.com. The AI-powered system analyzes your image and provides instant identification along with recommended solutions. This tool is particularly valuable for distinguishing between pest damage, disease, nutrient deficiency, and environmental stress, which can look similar to untrained eyes. Rather than spending hours researching and guessing, you get expert diagnosis in seconds.
Conclusion
The essentials of pepper plant care come down to this: they need warmth, light, consistent water, and good drainage. Provide those four things, monitor for common pests and diseases, and your peppers will reward you with abundant, delicious fruit. Remember that gardening involves some trial and error, even for experienced growers. Your first season might not be perfect, and that's completely fine. Each season teaches you something new, and every mistake is just a learning opportunity.
When you encounter something you can't identify or understand, don't hesitate to get expert help. Plantlyze.com offers instant plant diagnosis that removes the guesswork from problem solving. Whether you're growing peppers for the first time or perfecting your technique, the satisfaction of harvesting your own crop never gets old. Start with what you've learned here, stay consistent with care, and you'll be enjoying homegrown peppers before you know it. Happy growing!
References
Ohio State University Extension - "Growing Peppers in the Home Garden"
https://ohioline.osu.edu/factsheet/hyg-1618Oklahoma State University Extension - "Pepper Production"
https://extension.okstate.edu/fact-sheets/pepper-production.htmlCal Poly Pomona Nursery - "Pepper Plant Care"
https://www.calpolypomonanursery.com/pepper-plant-care/USDA Natural Resources Conservation Service - Pepper Growing Guides
https://plants.usda.gov/