Have you ever bitten into a bell pepper that was so crisp it snapped aloud, or tasted a jalapeno with just the right amount of kick to wake up your palate? If you are used to the produce you buy at the grocery store, you might be missing out on the true potential of this incredible vegetable. Store bought peppers are often picked early to survive shipping, which means they never quite reach their peak flavor or vitamin content.
There is something deeply satisfying about watching a tiny seed transform into a bushy plant loaded with vibrant fruit. I still remember my very first pepper harvest. It was a modest crop of cayenne peppers, but the salsa I made that afternoon tasted better than anything I had ever eaten in a restaurant.
Growing peppers might seem intimidating because they demand specific conditions, but I promise you it is not rocket science. With a little patience and the right strategy, anyone can do it. In this guide, we are going to walk through every single step of the process. We will cover choosing the right variety for your taste buds, starting seeds indoors, and managing the health of your plants until the very end of the season.
Gardening is a journey of learning. You will learn to read the leaves and understand what your soil needs. And for those moments when you are just not sure what your plant is trying to tell you, modern tools like Plantlyze can help bridge the gap. Plantlyze is an AI powered plant care tool that acts like a pocket botanist, helping you track growth and diagnose issues before they become disasters.
Ready to spice up your garden? Let’s get growing.
Phase 1: Choosing Your Varieties

Before you even touch a bag of soil, you need to decide what you want to eat. Peppers come in an astonishing array of shapes, sizes, colors, and heat levels. The most common way to measure heat is the Scoville Heat Unit (SHU) scale.
Sweet Peppers
If you prefer flavor without the burn, sweet peppers are your best friend.
Bell Peppers: The classic choice. They start green and ripen to red, yellow, or orange. The colored ones are sweeter and pack more Vitamin C.
Banana Peppers: Long and yellow, these are mild and tangy. They are fantastic for pickling or slicing onto sandwiches.
Pimiento: These are heart shaped, thick walled, and incredibly sweet. They are the secret ingredient in authentic pimento cheese.
Hot Peppers
For those who like it hot, the options are endless.
Jalapeno: The kitchen workhorse. They have a moderate heat that works well in almost any dish.
Serrano: Similar to jalapenos but thinner and significantly hotter.
Habanero: These small, lantern shaped peppers pack a serious punch with a fruity undertone. Handle these with care!
Thai Chili: Tiny but mighty. These are essential for Asian curries and stir fries.
When selecting your seeds, consider your climate. If you live in a region with a short summer, look for varieties that mature quickly, often labeled as "early season."
Phase 2: Starting from Seed vs Transplants

Peppers are heat lovers. They are tropical plants by nature, which means they take a long time to mature. In many climates, the growing season simply is not long enough to start a seed directly in the ground outside. You have two main options: start your own seeds indoors or buy young plants from a nursery.
Starting Seeds Indoors
This is the route for the dedicated gardener who wants specific varieties. You need to start your pepper seeds indoors about 8 to 10 weeks before your region's last expected frost date.
The Setup: Use a sterile seed starting mix, not heavy potting soil. You will need seed trays or small pots.
Heat is Crucial: Pepper seeds are picky. They germinate best when the soil temperature is between 80°F and 90°F (27°C to 32°C). A seedling heat mat is almost mandatory here. Without one, germination can take weeks or fail entirely.
Light: Once the little green sprouts appear, they need bright light immediately. A sunny windowsill is rarely enough. Use a grow light positioned just a few inches above the seedlings to prevent them from getting tall and spindly.
Buying Transplants
If you missed the seed starting window, do not worry. Buying transplants is a great way to catch up. When you are at the garden center, look for plants that are stocky and green. Avoid any plants that already have flowers or tiny peppers on them. You want the plant to focus on root growth after you plant it, not fruit production.
Phase 3: Soil and Site Preparation

Peppers crave the sun. You need to find a spot in your garden that receives at least 6 to 8 hours of direct sunlight every single day. The more sun, the better the fruit production.
Soil Quality
The soil is the foundation of your success. Peppers need soil that drains well and is rich in organic matter. They hate having "wet feet," which happens when water sits around the roots and causes rot.
Texture: Your soil should be loose and crumbly. If you have heavy clay, you must amend it with compost or peat moss to improve airflow.
Nutrients: Mix in a generous amount of aged manure or high quality compost a few weeks before planting. This provides a slow release feed that will last for months.
Temperature: Do not rush to plant! Peppers will stunt if the soil is cold. Wait until night temperatures are consistently above 55°F (13°C).
The Process of Hardening Off
You cannot just take a plant that has been living in your cozy living room and put it straight into the blazing sun and wind. It will die of shock. You need to "harden off" your plants.
Day 1 to 3: Put plants outside in a shady, protected spot for a few hours.
Day 4 to 7: Gradually expose them to more sun and wind.
Day 8: They should be ready for the ground.
When you plant, space them about 18 to 24 inches apart. This ensures they have good air circulation, which helps prevent diseases later in the season.
Phase 4: Care and Maintenance

Once your peppers are in the ground, the real work begins. Consistent care is the secret to a huge harvest.
Watering Wisdom
Peppers need a steady supply of water. If the soil goes from swampy to bone dry and back again, your plants will suffer. Inconsistent watering is the leading cause of blossom end rot. Aim to keep the soil evenly moist, like a wrung out sponge. Water at the base of the plant, not over the leaves, to avoid fungal issues.
Mulching
Put a thick layer of straw, shredded leaves, or pine bark around the base of your plants. This mulch acts as an insulator. It keeps the soil cool during heatwaves, retains moisture, and stops weeds from stealing nutrients.
Support Systems
Pepper plants can get heavy, especially when they are loaded with fruit. A strong wind or a heavy rain can snap a branch right off. It is smart to place a stake or a small wire cage around the plant when you first put it in the ground. As the plant grows, gently tie the main stem to the stake.
Feeding Strategy
Peppers are moderate eaters.
Early Season: Use a balanced fertilizer to help the plant establish leaves and roots.
Flowering Stage: Once you see the first white flowers, switch to a fertilizer with less nitrogen and more phosphorus and potassium. Too much nitrogen at this stage will give you a giant, bushy green plant with zero peppers.
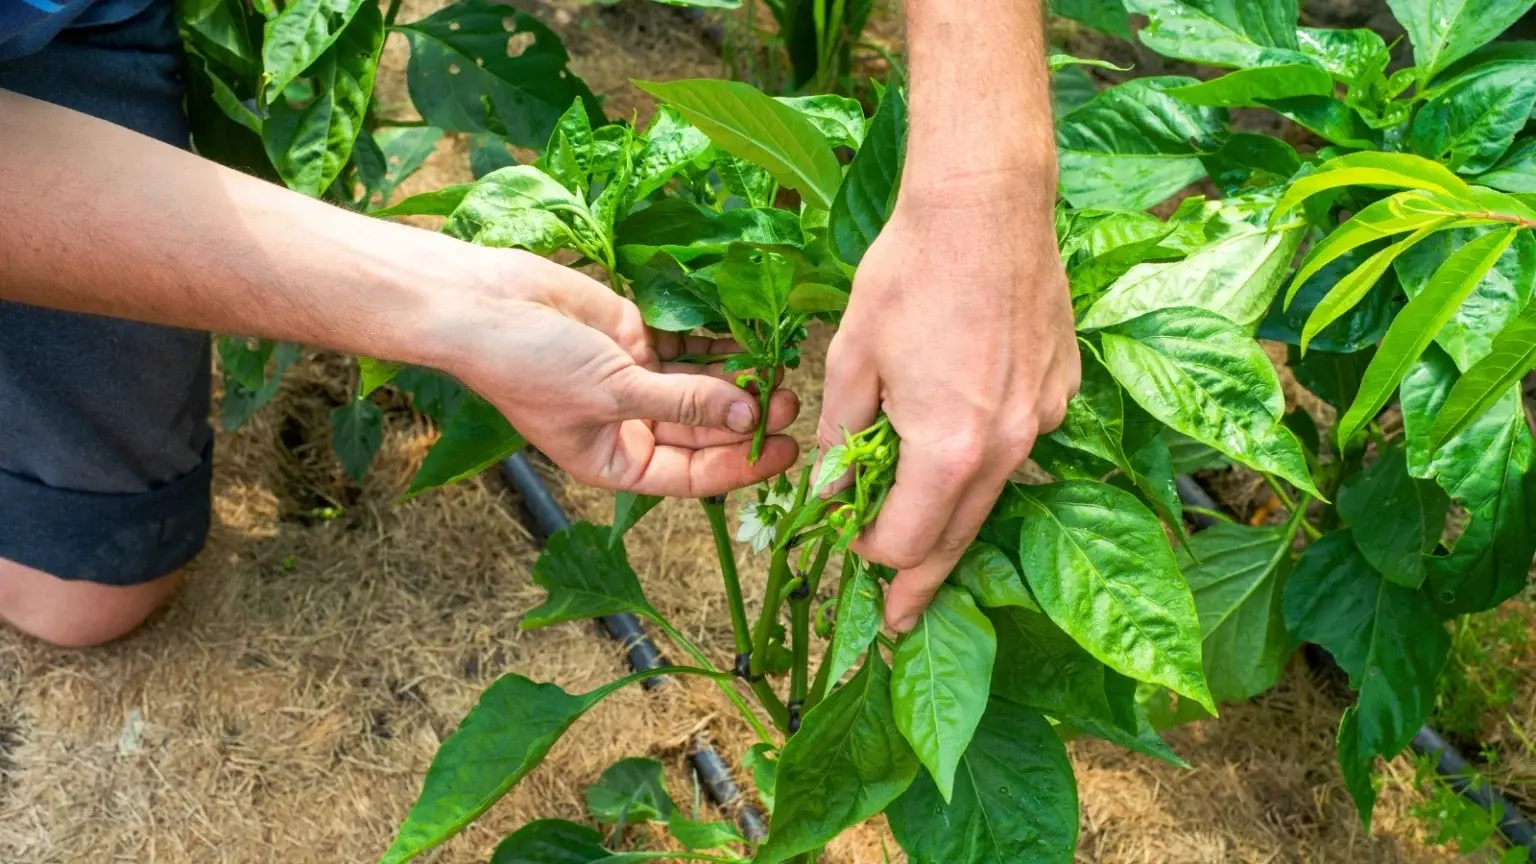
To Prune or Not to Prune?
Many gardeners swear by "topping" their peppers. This involves snipping off the very top growing point of the plant when it is about a foot tall. This forces the plant to grow two main stems instead of one, creating a bushier plant that is less likely to tip over. Pinching off the very first flowers encourages the plant to put energy into growing bigger before it starts making babies.
Phase 5: Troubleshooting Common Problems
Even the best gardeners face challenges. Nature is unpredictable, and pests are always hungry.
Pests
Aphids: These tiny green or black bugs suck the sap from new leaves. You can usually blast them off with a strong stream of water from your hose.
Tomato Hornworms: These giant green caterpillars can strip a plant bare overnight. Handpick them off and drop them in a bucket of soapy water.
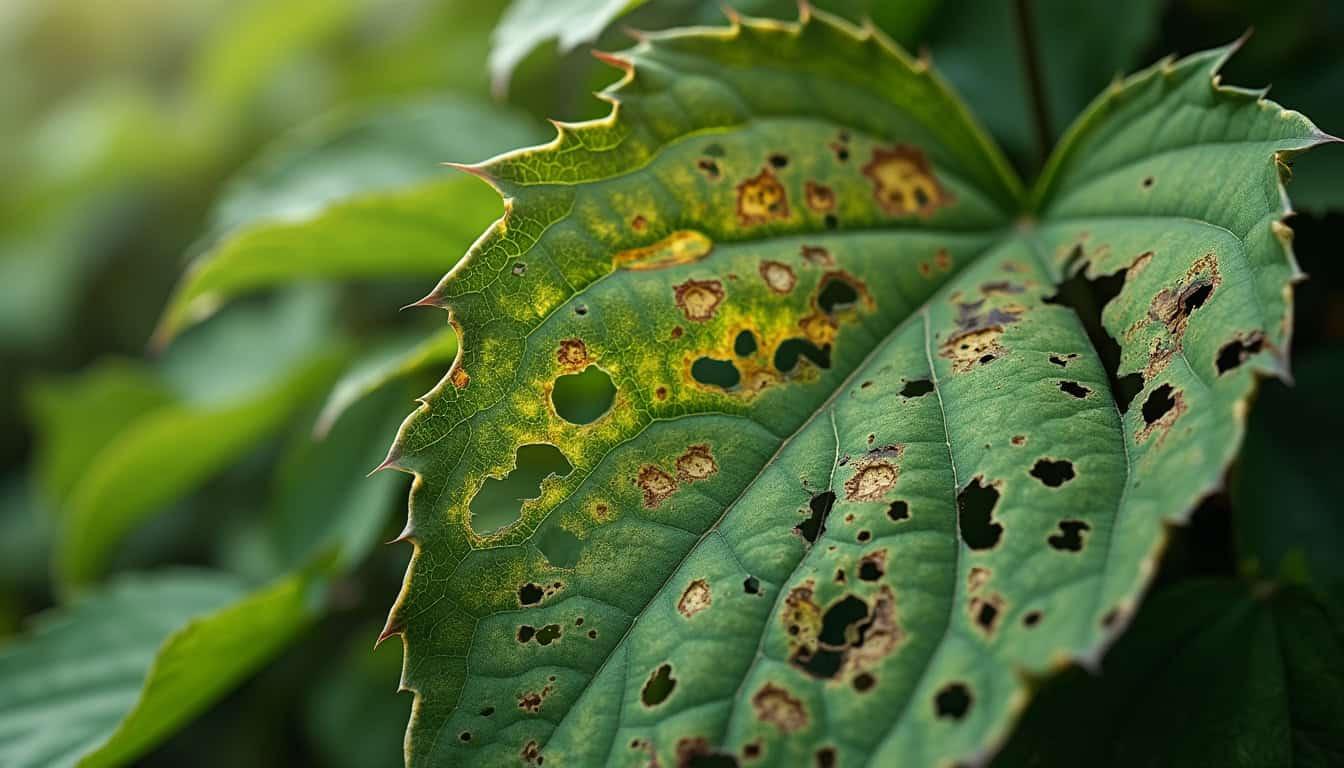
Diseases
Blossom End Rot: This looks like a dark, sunken scab on the bottom of the fruit. It is caused by a calcium deficiency, which is usually triggered by uneven watering.
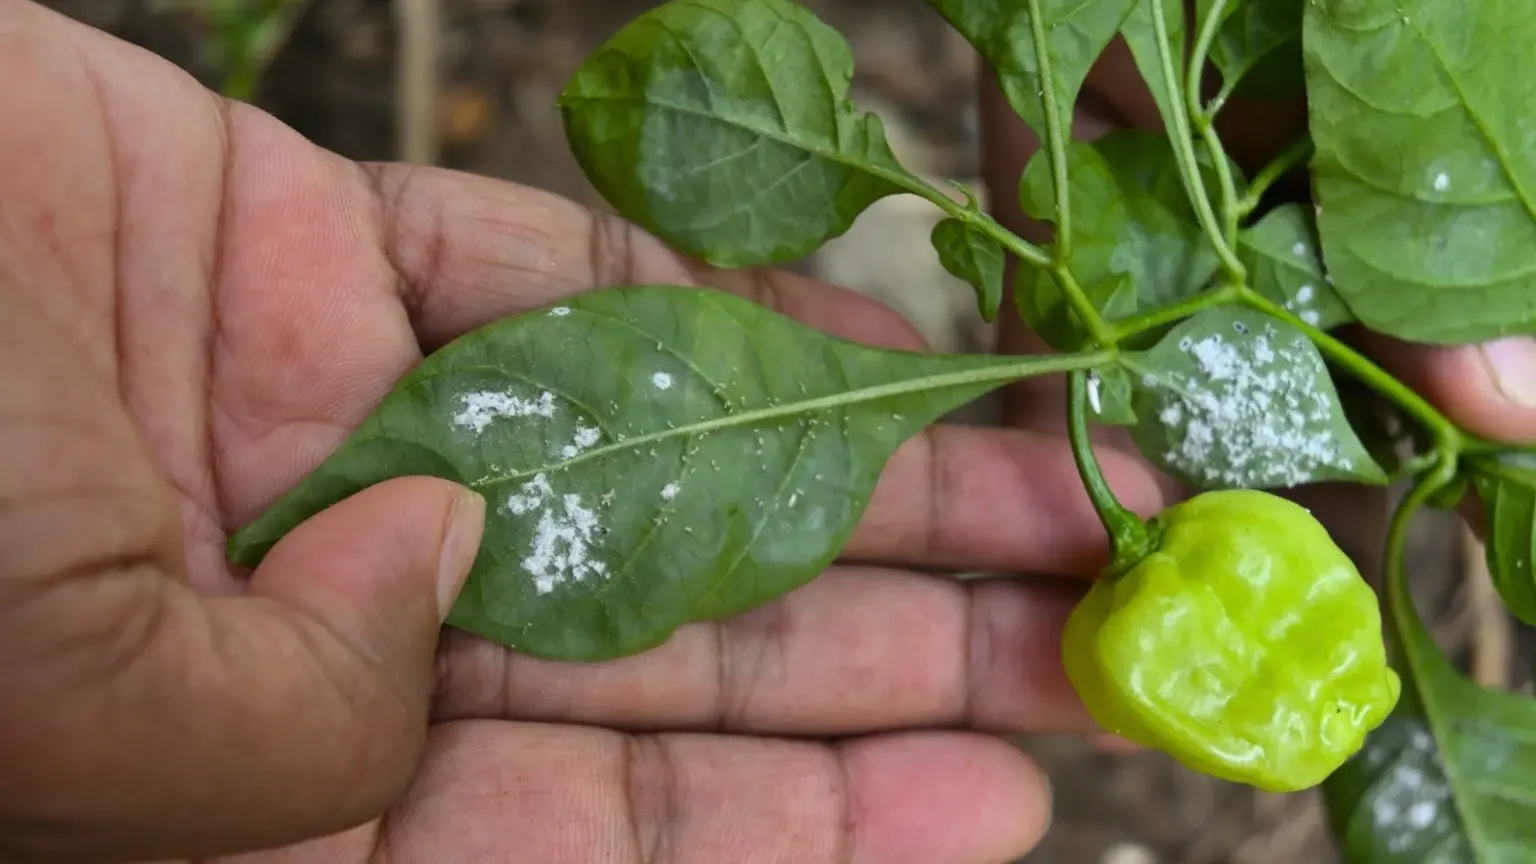
Powdery Mildew: A white, dusty coating on the leaves. Good airflow is the best prevention.
Technology to the Rescue
Sometimes, you look at a yellowing leaf or a weird spot and you just don't know what is wrong. Is it a fungus? Is it a nutrient deficiency? Is it a bug? Guessing can lead to the wrong treatment, which wastes time and money.
This is where Plantlyze becomes incredibly useful. It is an AI powered plant care tool designed to take the guesswork out of gardening. You can simply snap a photo of your sick plant, and the diagnosis tool analyzes the visual symptoms to tell you exactly what is wrong. Beyond just diagnosis, Plantlyze helps you create a care schedule so you never forget to water or fertilize. It is like having a master gardener in your pocket. If you want to stop guessing and start growing with confidence, check out plantlyze.com to see how it can help your garden thrive.
Phase 6: Harvest and Storage
This is the moment you have been working for.
When to Pick
Most peppers can be eaten at any stage. Green bell peppers are just unripe red peppers. If you leave them on the plant longer, they will change color and become sweeter and richer in vitamins. However, the longer you leave fruit on the plant, the fewer new flowers the plant will produce.
Harvesting Tip: Never pull the pepper off by hand. The stems are tough, and you might break the whole branch. Always use a pair of sharp scissors or garden shears to snip the stem just above the fruit.
Storage and Preservation
Fresh peppers will last in the refrigerator for a week or two. But if you have a bumper crop, you need a plan.
Freezing: This is the easiest method. Wash them, chop them, and throw them in a freezer bag. They will lose their crunch but are perfect for cooking in soups and stews later.
Drying: Thin walled peppers like cayennes dry very well. You can hang them in a dry, airy spot or use a dehydrator.
Pickling: Banana peppers and jalapenos are delicious when pickled in vinegar and spices.
Conclusion
Growing your own peppers is one of the most rewarding experiences you can have in the garden. There is a special kind of pride that comes from chopping up a colorful, crisp pepper that you nurtured from a tiny seed. Sure, you might encounter a few bugs or a wilting leaf along the way, but that is part of the process.
Remember that every season is different. Some years you will have more peppers than you know what to do with, and other years might be slower. Don't be too hard on yourself. Use resources like your local extension office or tools like Plantlyze to keep learning.
So get your hands dirty, feel the sun on your back, and enjoy the literal fruits of your labor. Your tacos, salads, and stir fries will never be the same again.
References
University of Minnesota Extension
https://extension.umn.edu/vegetables/growing-peppersUtah State University Extension
https://extension.usu.edu/yardandgarden/research/peppers-in-the-gardenRoyal Horticultural Society (RHS)
https://www.rhs.org.uk/vegetables/peppers/grow-your-own
Clemson Cooperative Extension
https://hgic.clemson.edu/factsheet/pepper/Rutgers University (Plant & Pest Advisory)
https://plant-pest-advisory.rutgers.edu/diagnosing-important-diseases-in-pepper-reference-guide/